
Purpose: Verify that the heating blankets (pads) on the ultrasonic cleaner are functioning properly by checking their resistance with a multimeter. Proper resistance confirms that the heating element is intact and operating within specifications.
Tools Needed:
Digital multimeter (with ohms resistance measurement capability) Phillip Screwdriver or appropriate tool to remove access panels Flashlight (optional) Insulated gloves (for safety)
Step 1 – Power Down and Unplug the Unit
Before beginning any inspection or testing: Turn off the ultrasonic cleaner and unplug it from the electrical outlet to ensure safety.
Step 2 – Access the Heating Blankets
Locate the side access panel on the unit. Remove the screws and carefully lift off the cover. You’ll see insulation (like the Nashua 324A foil-faced insulation) covering the internal components.
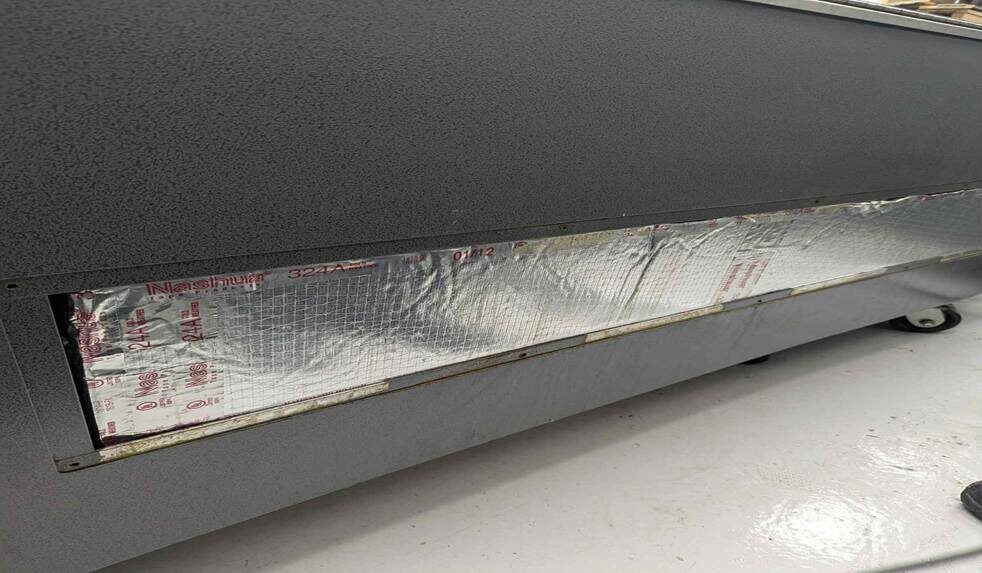
Gently remove the insulation panel to expose the heating blankets (pads) attached to the tank.

Step 3 – Identify the Heating Pads
Each heating pad is adhered to the back of the tank. The correct ohm resistance value is printed or stamped on the original heating pad label (e.g., “Resistance: 72W”). Record this value.
Step 4 – Prepare Your Multimeter
Set your multimeter to the W (ohms) setting. If it’s not auto-ranging, select a range that includes the expected resistance value.
Step 5 – Measure the Resistance
- Disconnect power leads going to the heating pad (if possible).
- Place one probe on each lead of the heating pad.
- Read the resistance displayed on the meter.
Example: If the pad label says “72W” and your meter reads between 71.8W and 73.2W, the pad is good.
Step 6 – Interpret the Results
Within ±5% of the labeled ohms value = Good Higher resistance = Possible internal break or partial failure Lower resistance = Possible short circuit OL or Infinite reading = Pad failed completely
If you’re replacing a heating pad, first confirm whether your ultrasonic cleaner operates on 120V or 240V. Then, order the correct replacement pad from Omegasonics.com under the Spare Parts and Accessories section. When installing the new pad, use a high-temperature silicone adhesive to secure it in the exact same position as the original.
Step 7 – Reinstall Insulation and Panels
Once measurements are complete, reinstall the insulation panel securely and replace all screws. Plug the machine back in and restore power.
Step 8 – Final Notes
Check all heating pads individually; each may have a slightly different ohm rating. Record all readings for maintenance logs. Replace any heating pad that is out of specification before operating the machine again.