


Omegasonics Ultrasonic Cleaner Troubleshooting Guide
Select your machine and the issue you are experiencing to see possible causes, quick checks, and recommended next steps for heat, pump, ultrasound, power, float switch, breaker, and maintenance problems.
Quick Start Guide
Start with the troubleshooting selector or jump directly to the section you need.
Select Your Machine
Choose the closest Omegasonics model or system type.
Select the Problem
Pick the issue that best matches what the machine is doing.
Troubleshooting Selector
Use this tool as a first step before contacting support. Always disconnect power before removing panels or inspecting internal components.
Quick Safety Checklist
Before troubleshooting, review these safety points.
Recommended First Test: Isolate the Exact Issue
For many Pro Series and similar machines, isolate the issue by testing one function at a time:
- Turn off Ultrasound.
- Turn off Heat.
- Turn off Pump.
- Leave the green Power push button pressed in and illuminated.
- Turn on Pump and confirm whether it operates.
- Turn off Pump.
- Turn on Heat and confirm whether it operates.
- Turn off Heat.
- Turn on Ultrasound and confirm whether it operates.
- Turn off Ultrasound.
Common Components to Check
| Component | What It Does | Common Symptom |
|---|---|---|
| Float Switch / Float Sensor | Prevents operation when water level is too low. | Panel lights are on but heat, pump, or ultrasound will not operate. |
| Ice Cube Relay | Part of the low-water/float safety circuit on many machines. | Machine functions are locked out even when water level is correct. |
| Power Contactor | Controls main switched power to the machine circuits. | No function even when the panel appears powered. |
| Heat Contactor | Controls power to heating blankets/elements. | No heat, overheating, or heat contactor chattering. |
| Sonics Contactor | Controls power to the ultrasonic generator circuit. | Ultrasound not activating or breaker trip when sonics start. |
| Pump Contactor | Controls pump motor power. | Pump does not start or pump trips breaker. |
| Generator | Powers the ultrasonic transducers. | No ultrasound, weak ultrasound, or breaker trips when generator is connected. |
| Heating Blanket | Heats the tank. | No heat, slow heat, or heat circuit trips breaker. |
| Filters | Removes contamination from recirculating fluid. | Pump runs but spray bar has low or no water flow. |
Advanced Diagnostic Checks: Heat Pads & Ultrasonic Transducers
Use these checks when the troubleshooting selector points toward a possible heating blanket, weak ultrasound, uneven cavitation, generator, or transducer issue. These steps are for qualified personnel only. Always disconnect power before removing panels or testing internal components.
Heating Pad Ohms Resistance Check
Purpose: Verify whether a heating blanket/pad is intact by checking resistance with a digital multimeter set to ohms.
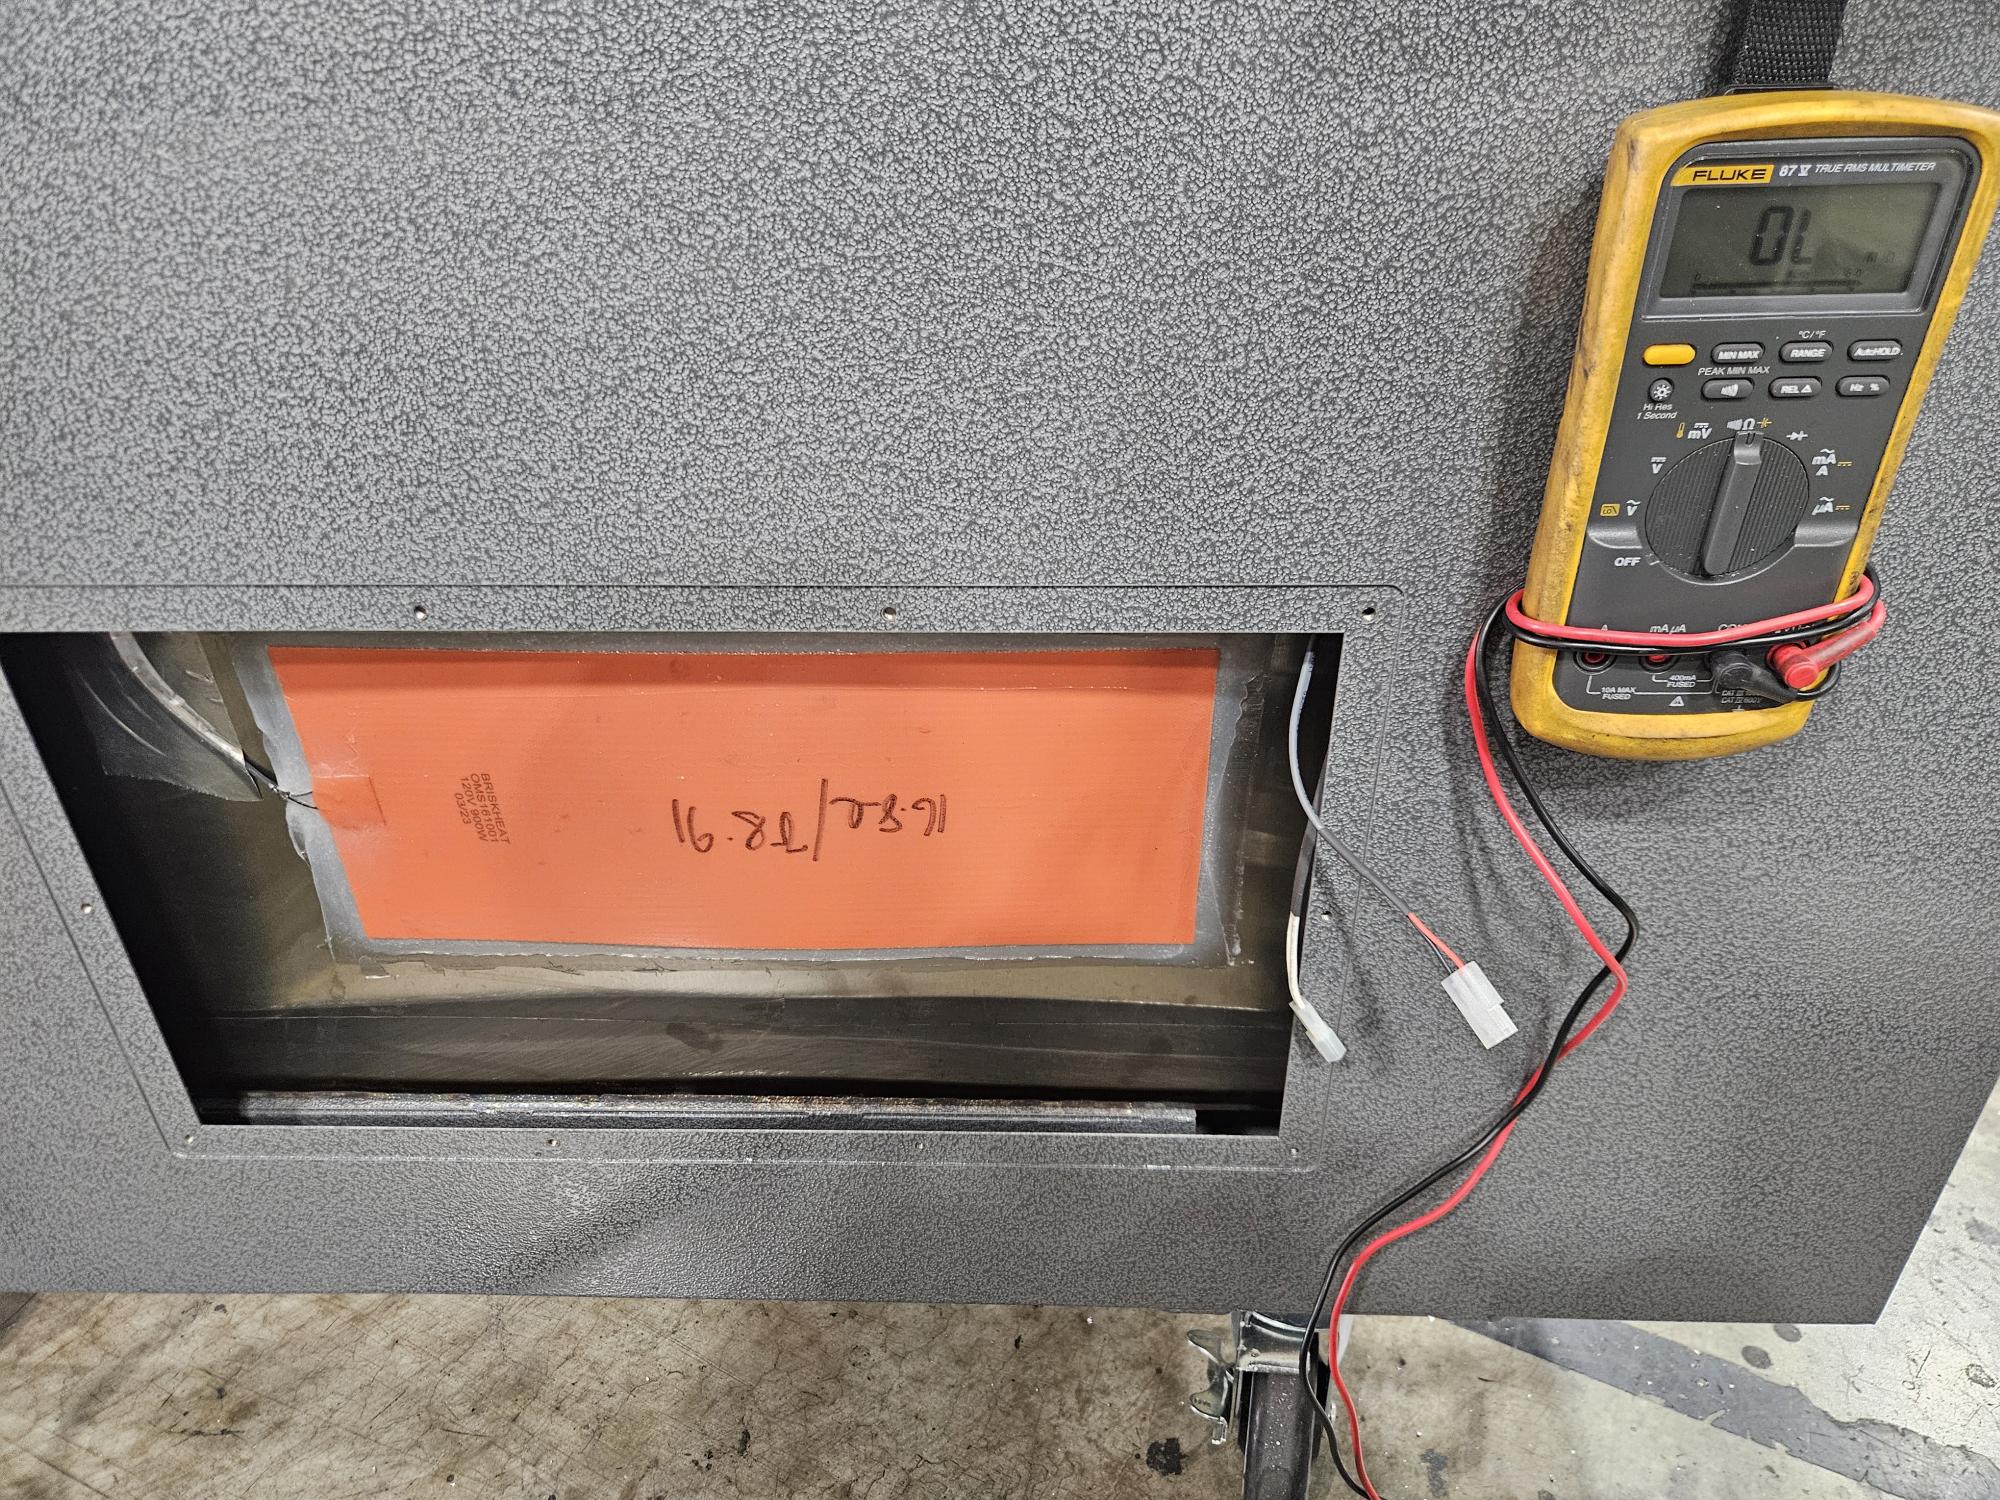
Heating pad ohms check: Disconnect power, isolate the pad leads, and compare the meter reading to the ohms value printed on the heating pad.
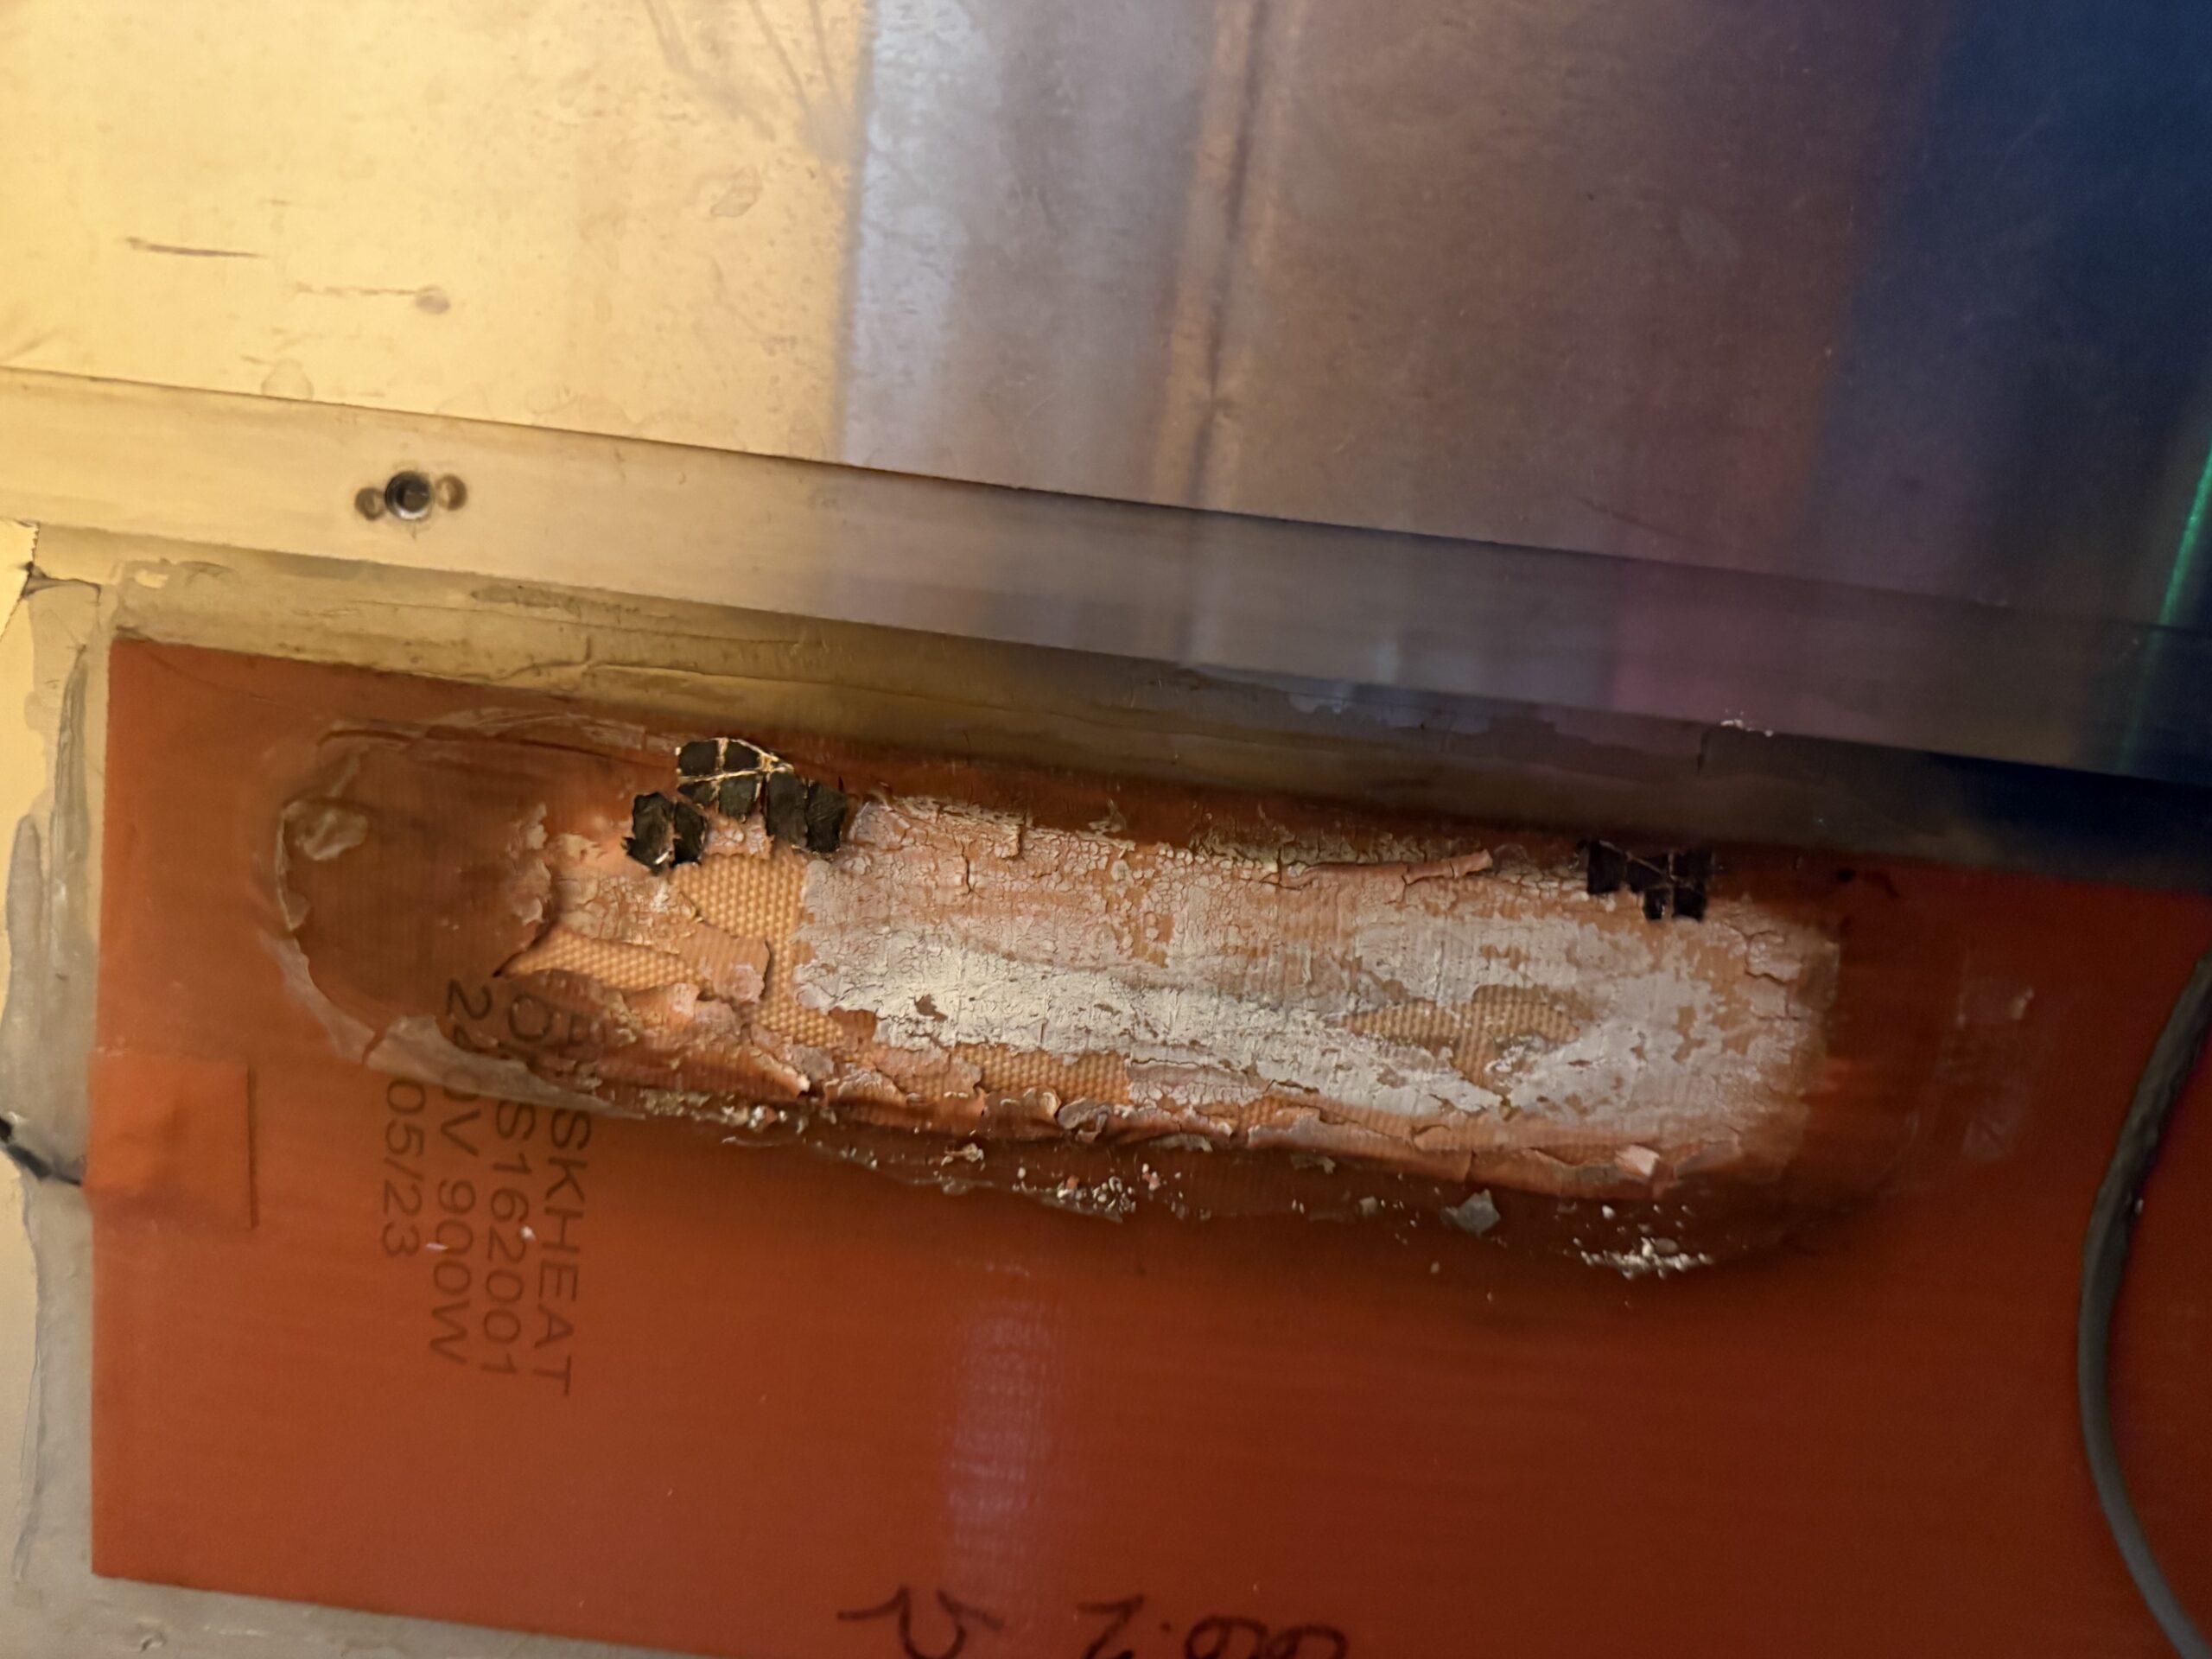
Look for visible damage: Burnt, charred, cracked, white, or physically damaged heat blankets should be replaced before operating the machine.
- Turn off the ultrasonic cleaner and unplug it from power.
- Remove the side access panel and carefully expose the heating blankets.
- Identify each heating pad and record the labeled resistance value printed or stamped on the pad.
- Set the multimeter to the Ω / ohms setting.
- If possible, disconnect the power leads from the heating pad.
- Place one meter probe on each heating pad lead and read the resistance.
- Compare the reading to the labeled ohms value.
Within ±5% of the labeled ohms value = likely good.
Higher resistance = possible internal break or partial failure.
Lower resistance = possible short circuit.
OL or infinite reading = failed pad.
Replacement note: Before ordering a heating pad, confirm whether the machine is 120V or 240V and match the replacement pad to the original location and rating.
Piezoelectric Crystal / Transducer Check
Purpose: Check for loose, damaged, de-bonded, corroded, weak, open, or shorted transducers when ultrasonic performance is weak or uneven.
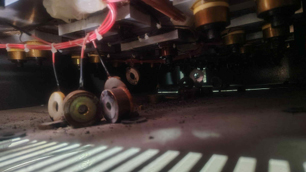
Transducer visual inspection: Look underneath the tank for crystals that are loose, hanging, de-bonded, corroded, wet, burnt, or damaged.
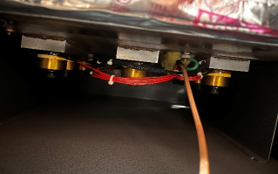
Normal bonded crystals: Bonded crystals should be secure against the tank and should not be hanging loose or separated from the mounting surface.
- Power down the ultrasonic cleaner, unplug it, and wait several minutes.
- Locate the coax cable between the transducer and generator.
- Disconnect one coax connector at a time so each transducer can be tested individually.
- Visually inspect underneath the tank for loose, hanging, de-bonded, corroded, wet, burnt, or broken transducers/wires.
- Set a capacitance meter or multimeter to capacitance mode, often labeled Cx or CAP.
- Connect the red lead to the center pin of the coax connector.
- Connect the black lead to the outer metal shell/locking connector.
- Record each reading and repeat for every transducer.
Normal transducer: approximately 22,000 pF / 22 nF.
Acceptable tolerance: typically ±10–15%.
Below 10,000 pF = weak or open transducer.
Very high reading or OL/infinite = possible shorted or failed transducer.
Repair note: If crystals are loose, hanging, de-bonded, corroded, or damaged, the unit may need professional service, transducer replacement, or an RMA.
Weak Ultrasonic Power: Generator Power Knobs & Aluminum Foil Test
If the ultrasonic power seems low, the machine is cleaning slower than normal, or cavitation looks weak, start by checking whether the ultrasonic generator power has been turned down before assuming the generator or transducers have failed.
Check for Ultrasonic Power Adjustment Knobs
Some Omegasonics machines have power adjustment knobs on the ultrasonic generators. If these knobs are turned down, the machine may still make ultrasonic sound but will not clean with full power.
If your machine has internal generators, the power adjustment may be directly on the generator face. Only access internal electrical areas if you are qualified to do so safely. Usually behind the right hand end lower louvered panel held on by Phillips screws.
On many contents restoration machines, the ultrasonic power knobs may be located on the outside of the machine for easier access.
Some older machines have a small access door on the lower front right-hand corner. Open this door to access the ultrasonic generators and check the power knobs.
Aluminum Foil Cavitation Test
The aluminum foil test is a simple way to check whether ultrasonic cavitation is being produced evenly throughout the tank.
- Fill the tank to the correct operating level with water and make sure the machine is ready to run.
- Place a piece of aluminum foil in a basket and weight it down so it stays submerged in the water.
- Turn the ultrasonics on and let the machine run for up to 5 minutes.
- Remove the foil and inspect it.
Ultrasonic Squealing Noise: Feedback, Air in the Water & Degassing
A loud squealing, screaming, or high-pitched noise coming from the tank is often caused by ultrasonic feedback. In many cases, this is not a failed generator or transducer. It is usually caused by air trapped in the water or air being pushed into the ultrasonic field while the machine is running.
Why It Happens
Fresh water naturally contains dissolved air. Cold water, plain water, low soap concentration, or baskets being dropped straight down into the tank can introduce extra air. When the ultrasonics hit that air, the tank may produce a loud squealing or high-pitched feedback sound.
Freshly filled tank, cold water, little or no cleaning solution, hollow items trapping air, or baskets pushed straight down into the water.
Warm water, properly mixed cleaning solution, degassed water, and baskets inserted slowly at a slight angle.
This condition is most common right after filling the tank with fresh water. Many machines become noticeably quieter after the ultrasonics run for 10–20 minutes and the water has time to degas.
How to Reduce or Stop Ultrasonic Squealing
- Allow the ultrasonics to run for several minutes so the water can degas.
- Heat the water to the proper operating temperature. Warm water usually holds less trapped air and is less likely to create feedback.
- Make sure the correct amount of Omegasonics cleaning solution has been added. Proper chemistry helps stabilize cavitation and can reduce feedback noise.
- Insert baskets into the tank slowly and at a slight angle instead of pushing them straight down. This allows trapped air to escape instead of forcing air into the water.
- Make sure hollow items, cups, containers, and similar parts are not trapping large air pockets under the surface.
If Your Machine Has Ultrasonic Power Adjustment Knobs
If the squealing continues and your machine has ultrasonic power knobs, turn the ultrasonic power all the way down, then slowly bring the power back up while the ultrasonics are running. This can often help the ultrasonic generators re-stabilize and stop the feedback noise.
Programming Manuals & Quick Instructions
If the issue appears to be related to a timer or temperature controller, use the quick notes below to identify the controller and download the correct programming guide. These instructions are intended to help with basic programming, lock/unlock settings, high-limit settings, timer setup, and calibration checks.
Love 16C Temperature Controller
- Used on many older and current Omegasonics systems.
- Common checks include Fahrenheit/Celsius, high temperature limit, on/off heat control, and lock mode.
- Use this if the heat controller settings appear wrong or the set point cannot be changed.
SOLO Temperature Controller
- Unlocks using the Set and ɷ buttons.
- Common settings include thermocouple type, Fahrenheit/Celsius, high/low limits, heat mode, alarms, and lock mode.
- Use this when replacing or reprogramming a SOLO controller.
SD6 Temperature Controller
- Accesses the setup page by pressing the UP/DOWN arrows together.
- Common settings include sensor type, Fahrenheit/Celsius, high set point, heat output, lock mode, and calibration offset.
- Use this for SD6 temperature programming or calibration checks.
PM31 Temperature Controller
- Includes factory-page unlock steps, lock settings, hysteresis, and high temperature limit programming.
- Important: Do not change password settings unless instructed by Omegasonics.
- Use this when the PM31 controller is locked or needs high-limit adjustment.
Series 93 Temperature Controller
- Uses UP/DOWN arrows to enter programming.
- Common settings include input type, Fahrenheit/Celsius, low/high limits, heat output, display mode, calibration, and hysteresis.
- Use this when working with older Series 93 controllers.
NAIS Timer Programming
- Provides switch positions for minutes:seconds and hours:minutes timer setup.
- Use this when the timer scale or time range appears incorrect.
- Verify the correct time range before replacing the timer.
Autonics LE4S Timer Manual
- Full timer manual covering time setting, output operation modes, key lock, input settings, and wiring cautions.
- Use this when the LE4S timer display, timing mode, or output mode needs to be checked.
- Have a qualified person handle wiring or replacement.
Dual Output Timer Instructions
- Includes P/E button programming steps for dual timing sequences.
- Useful when setting or correcting second timing sequence behavior.
- Use this if the timer has separate P1/P2 or dual-output timing functions.
Service Schedule Recommendations
Service intervals depend on usage, soil load, type of contaminant, and cleaning volume.
| Usage Level | Soap / Bath Change | Filter Change |
|---|---|---|
| High Volume | Every 3–4 weeks | Every 3–4 weeks |
| Medium Volume | Every 4–8 weeks | Every 4–8 weeks |
| Low Volume | Every 8–12 weeks | Every 8–12 weeks |
Model Reference
Common Omegasonics machines and product families included in this troubleshooting tool.
| Product Family | Models Included | Common Notes |
|---|---|---|
| Tabletop / Small Parts | 7850TT, 7950TT, 1420BTD | Small parts, lab, repair, additive manufacturing, electronics, and light industrial use. |
| Industrial Pro Series | Pro, Pro Plus, Super Pro, 5038i, Power Pro 6000, Power Pro 8000, SST4030, 4430 | Industrial parts cleaning, aerospace, automotive, machining, MRO, oil & gas, and production cleaning. |
| Contents Restoration | RP3, 3600UW, 5224UW | Contents cleaning, electronics restoration support, rinse, dryer, and production workflow considerations. |
| Specialty Systems | Music Pro, Music Pro Plus, Omega Saw Pro, Omega Saw Pro Plus, Blind Cleaning Systems | Application-specific cleaning systems for instruments, saw blades, and blinds. |
| Custom Systems | Custom tanks, multi-stage systems, wash/rinse/dry lines | May require support review by model, serial number, photos, and system layout. |
⚠️ When to Stop and Contact Omegasonics
Stop troubleshooting and contact Omegasonics immediately if:
- You see burnt, melted, loose, or exposed wiring.
- The machine repeatedly trips the breaker.
- The temperature rises uncontrollably.
- Heat blankets are black, charred, cracked, or physically damaged.
- You are not qualified to work inside an electrical panel.
- You need replacement parts, generator repair, controller programming, or an RMA.
Safety First: Disconnect power before opening electrical panels or inspecting internal components.
Need Replacement Parts?
If your troubleshooting steps point to a failed filter, heating blanket, pump, timer, controller, contactor, generator component, float switch, fuse, or other service part, Omegasonics offers replacement parts to help get your machine back in service.
Tip: If you are not sure which part you need, contact Omegasonics before ordering. Have your model number, photos, and a description of the symptom ready so our team can help confirm the correct replacement part.
✔ Before You Contact Omegasonics Support
Completing this checklist before contacting support can significantly reduce troubleshooting time and help Omegasonics identify the correct solution faster.
Contactor Click Test: Heat, Pump, and Ultrasonics
When each function is turned on, you should typically hear a distinct click. That click is usually the contactor pulling in. The center of the contactor is moving inward to close the circuit and send power to that function.
The heat contactor should pull in when the heat circuit is calling for heat and all safeties are satisfied.
The pump contactor should pull in when the pump switch is turned on and the machine has proper power.
The sonics contactor should pull in when the ultrasonic switch/timer is activated and the float switch circuit is satisfied.
The issue may be a switch, timer, float switch, relay, contactor coil, loose wire, breaker, or control-voltage problem. Confirm the water level is correct and that the float switch is satisfied before assuming the contactor is bad.
A qualified technician can carefully press the center of a contactor inward with an insulated screwdriver to verify whether the connected function turns on. This should only be done as a brief diagnostic test by someone qualified to work around live electrical components. Keep hands, tools, and loose wires clear of terminals. If the function turns on when the center is manually pressed, the load side of the circuit may be working and the issue may be in the control circuit, switch, relay, float switch, timer, or contactor coil.
Gather This Information Before Contacting Support
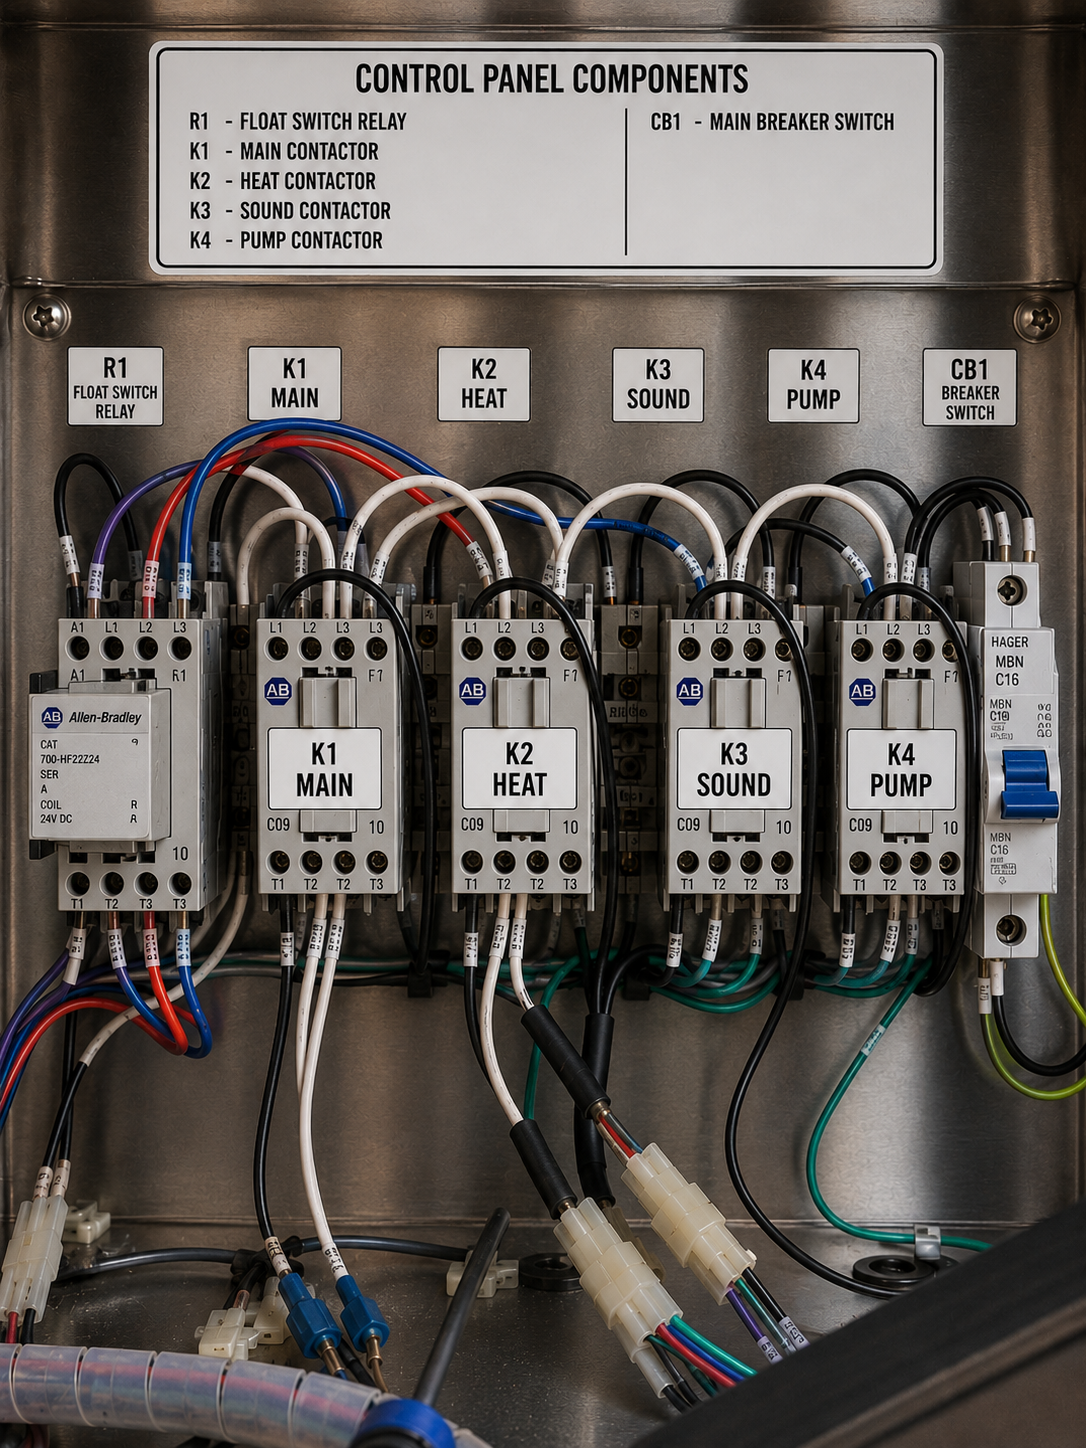
Customers who provide photos, model information, voltage readings, heating pad readings, or transducer readings typically receive faster troubleshooting assistance because our technicians can often identify the issue before the call.
✔ Control panel photo
✔ Electrical panel photo
✔ Float switch photo
✔ Heating blanket photo
✔ Generator photo
✔ Contactors and relays photo
✔ Pump photo
✔ Any visible damage or burnt components
✔ Ohms or capacitance readings if available
Repair / RMA Form
If Omegasonics Technical Support asks you to send in a machine, generator, or other part for repair, complete this form and include it with the shipment.
Omegasonics Repair / RMA Form
Include this completed form inside the box with the machine, generator, or part being sent in.
Omegasonics
330 E. Easy Street, Suite A
Simi Valley, CA 93065
888-989-5560 |
- Include this completed form inside the package and write the assigned RMA number on the outside of the box.
- Package the machine or generator securely to prevent shipping damage. Protect generator connectors, coax ports, switches, and displays.
- Remove all water, cleaning solution, loose parts, baskets, and accessories unless Omegasonics specifically asks for them.
- Use a trackable shipping method and keep photos of the item, packaging, and tracking number for your records.
Need Help Troubleshooting Your Omegasonics Machine?
Call 888-989-5560 or email Omegasonics with your model, serial number, symptom, photos, and what steps you already tried. Our team can help confirm whether the issue is water level, float switch, pump, filters, heat blanket, contactor, generator, timer, controller, wiring, or another component.
Machine Manuals
Use the buttons below to open the correct Omegasonics machine manual. Manuals are listed in numerical order to make the right model easier to find.